AppIntro

AppIntro is an Android Library that helps you make a cool intro for your app, like the ones in Google apps.

Usage

Basic usage

  1. Add the JitPack repository to your build file

Add it in your root build.gradle at the end of repositories:

	allprojects {
		repositories {
			...
			maven { url 'https://jitpack.io' }
		}
	}
  1. Add the dependency

Please note that AppIntro supports Android X. If you haven't migrated yet, you probably want to use
a previous version of the library that uses the old Support Library packages (or try Jetifier Reverse mode).

	dependencies {
	        // AndroidX Capable version
	        implementation 'com.github.AppIntro:AppIntro:5.1.0'
	        
	        // *** OR ***
	        
	        // Support Library compatibility version 
	        implementation 'com.github.AppIntro:AppIntro:4.2.3'
	}

Create a new Activity that extends AppIntro:

public class IntroActivity extends AppIntro {
    @Override
    protected void onCreate(@Nullable Bundle savedInstanceState) {
        super.onCreate(savedInstanceState);

        // Note here that we DO NOT use setContentView();

        // Add your slide fragments here.
        // AppIntro will automatically generate the dots indicator and buttons.
        addSlide(firstFragment);
        addSlide(secondFragment);
        addSlide(thirdFragment);
        addSlide(fourthFragment);

        // Instead of fragments, you can also use our default slide.
        // Just create a `SliderPage` and provide title, description, background and image.
        // AppIntro will do the rest.
        SliderPage sliderPage = new SliderPage();
        sliderPage.setTitle(title);
        sliderPage.setDescription(description);
        sliderPage.setImageDrawable(image);
        sliderPage.setBgColor(backgroundColor);
        addSlide(AppIntroFragment.newInstance(sliderPage));

        // OPTIONAL METHODS
        // Override bar/separator color.
        setBarColor(Color.parseColor("#3F51B5"));
        setSeparatorColor(Color.parseColor("#2196F3"));

        // Hide Skip/Done button.
        showSkipButton(false);
        setProgressButtonEnabled(false);

        // Turn vibration on and set intensity.
        // NOTE: you will probably need to ask VIBRATE permission in Manifest.
        setVibrate(true);
        setVibrateIntensity(30);
    }

    @Override
    public void onSkipPressed(Fragment currentFragment) {
        super.onSkipPressed(currentFragment);
        // Do something when users tap on Skip button.
    }

    @Override
    public void onDonePressed(Fragment currentFragment) {
        super.onDonePressed(currentFragment);
        // Do something when users tap on Done button.
    }

    @Override
    public void onSlideChanged(@Nullable Fragment oldFragment, @Nullable Fragment newFragment) {
        super.onSlideChanged(oldFragment, newFragment);
        // Do something when the slide changes.
    }
}

Note above that we DID NOT use setContentView();

Finally, declare the activity in your Manifest like so:

<activity android:name="com.example.example.intro"
    android:label="@string/app_intro" />

Do not declare the intro as your main app launcher unless you want the intro to launch every time your app starts.
Refer to the wiki for an example of how to launch the intro once from your main activity.
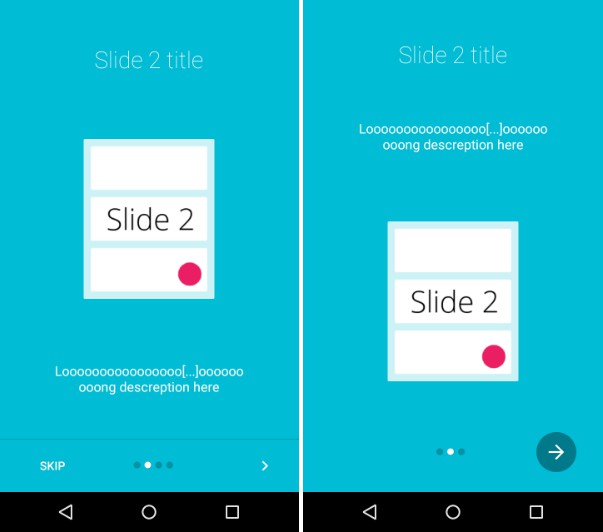
Alternative layout

If you want to try an alternative layout (as seen in Google's Photo app), just extend AppIntro2 in your Activity. That's all :)

public class IntroActivity extends AppIntro2 {
    // ...
}


Slides

Basic slides

AppIntro provides two simple classes, AppIntroFragment and AppIntro2Fragment which one can use to build simple slides.

@Override
protected void onCreate(@Nullable Bundle savedInstanceState) {
    // ...

    addSlide(AppIntroFragment.newInstance(title, description, image, backgroundColor));
}
Custom slides example

One may also define custom slides as seen in the example project:

  • Copy the class SampleSlide from my example project.
  • Add a new slide with addSlide(SampleSlide.newInstance(R.layout.your_slide_here));

There's no need to create one class for fragment anymore. :)

Extended usage

Animations

AppIntro comes with some pager animations.
Choose the one you like and then activate it with:

@Override
protected void onCreate(@Nullable Bundle savedInstanceState) {
    // ...

    setFadeAnimation();
}

Available animations:

setFadeAnimation()
setZoomAnimation()
setFlowAnimation()
setSlideOverAnimation()
setDepthAnimation()

If you want to create nice parallax effect or your own custom animation, create your own PageTransformer and call:

@Override
protected void onCreate(@Nullable Bundle savedInstanceState) {
    // ...

    setCustomTransformer(transformer);
}

Click here to see how I did it in the example app.

Background color transitions

AppIntro supports background color transitions:

In order to setup the transitions, simply implement ISlideBackgroundColorHolder:

public final class MySlide extends Fragment implements ISlideBackgroundColorHolder {
    @Override
    public int getDefaultBackgroundColor() {
        // Return the default background color of the slide.
        return Color.parseColor("#000000");
    }

    @Override
    public void setBackgroundColor(@ColorInt int backgroundColor) {
        // Set the background color of the view within your slide to which the transition should be applied.
        if (layoutContainer != null) {
            layoutContainer.setBackgroundColor(backgroundColor);
        }
    }
}

The API is quite low-level, therefore highly customizable. The interface contains two methods:

  • getDefaultBackgroundColor: Return the default background color (i.e. the background color the slide has in non-sliding state) of the slide here.
  • setBackgroundColor(int): This method will be called while swiping between two slides. Update the background color of the view to which the transition should be applied.
    This is normally the root view of your Fragment's layout. But one may also apply the color transition to some other view only (i.e. a Button).

Runtime Permissions (Android 6.0+)

Android 6.0 introduced a new permissions model for developers. Now all your apps have to request permissions which can be a tedious thing to implement.

However, AppIntro simplifies this down to one single line of code!

@Override
protected void onCreate(@Nullable Bundle savedInstanceState) {
    // ...

    // Ask for CAMERA permission on the second slide
    askForPermissions(new String[]{Manifest.permission.CAMERA}, 2); // OR

    // This will ask for the camera permission AND the contacts permission on the same slide.
    // Ensure your slide talks about both so as not to confuse the user.
    askForPermissions(new String[]{Manifest.permission.CAMERA, Manifest.permission.READ_CONTACTS}, 2);
}

NOTE: It is advised that you only put one permission in the String array unless you want the app to ask for multiple permissions on the same slide.

NOTE 2: Requesting permissions automatically disables sliding, and users will have to result to pressing the buttons. Please do not open any issues regarding this, as they will be immmediately closed. Thanks!
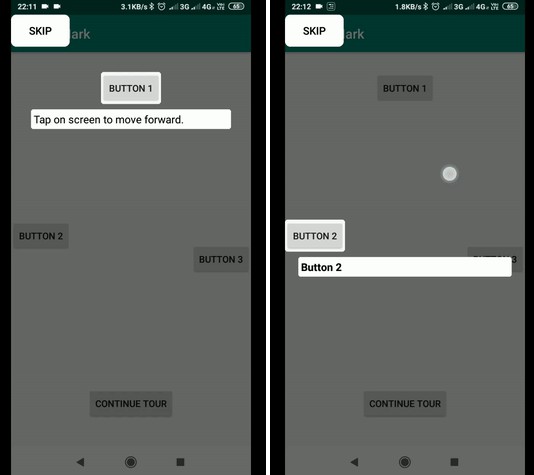
Slide Policies

If you want to restrict navigation between your slides (i.e. the user has to toggle a checkbox in order to continue), our Slide Policy feature might help you.

All you have to do is implement ISlidePolicy in your slides:

public final class MySlide extends Fragment implements ISlidePolicy {
    @Override
    public boolean isPolicyRespected() {
        return // If user should be allowed to leave this slide
    }

    @Override
    public void onUserIllegallyRequestedNextPage() {
        // User illegally requested next slide
    }
}

The interface contains two methods:

  • isPolicyRespected: The return value of this method defines if the user can leave this slide, i.e. navigate to another one
  • onUserIllegallyRequestedNextPage: This method gets called if the user tries to leave the slide although isPolicyRespected returned false. One may show some error message here.

Translating

Do you want to help AppIntro becoming international ?? We are more than happy!
AppIntro currently supports the following languages.

To add a new translation just add a pull request with a new strings.xml file inside a values-xx folder (where xx is a two-letter ISO 639-1 language code).

In order to provide the translation, your file needs to contain the following strings:

<?xml version="1.0" encoding="utf-8"?>
<resources xmlns:tools="http://schemas.android.com/tools">
    <string name="app_intro_skip_button">[Translation for SKIP]</string>
    <string name="app_intro_next_button">[Translation for NEXT]</string>
    <string name="app_intro_back_button">[Translation for BACK]</string>
    <string name="app_intro_done_button">[Translation for DONE]</string>
    <string name="app_intro_image_content_description">[Translation for "graphics"]</string>
</resources>

An updated version of the english version translation is available here.

Example App

See example code here on GitHub. You can also see it live by downloading our example on Google Play.

Real life examples

Do you need inspiration? A lot of apps are using AppIntro out there:

Planets

Hermes - Material IRC Client


GitHub