GoogleMapsAnimations

"GoogleMapsAnimations" is an awesome first of its type android library for showing a ripple and radar animations on a google map, e.g show catchment area of an earthquake where ripples have been felt, give prominence to certain markers which need to be highlighted. Also add a ripple when your user is moving on the map and give a #PokemonGo type ripple effect and also add a radar type effect to show users that you are searching in certain area.

Below samples show the ripple effect in action:
GoogleMapsAnimationscs

GoogleMapsAnimationsz

GoogleMapsAnimationsC

GoogleMapsAnimations

Download

Using Gradle: under dependencies section:

compile 'com.github.aarsy.googlemapsanimations:googlemapsanimations:1.0.5'

or Using Maven:

<dependency>
    <groupId>com.github.aarsy.googlemapsanimations</groupId>
    <artifactId>googlemapsanimations</artifactId>
    <version>1.0.5</version>
    <type>pom</type>
</dependency>

Documentation

Ripple Animation

Default Ripple animation

Just two lines of code :
Use .startRippleMapAnimation() and .stopRippleMapAnimation() methods to start and stop Animation.
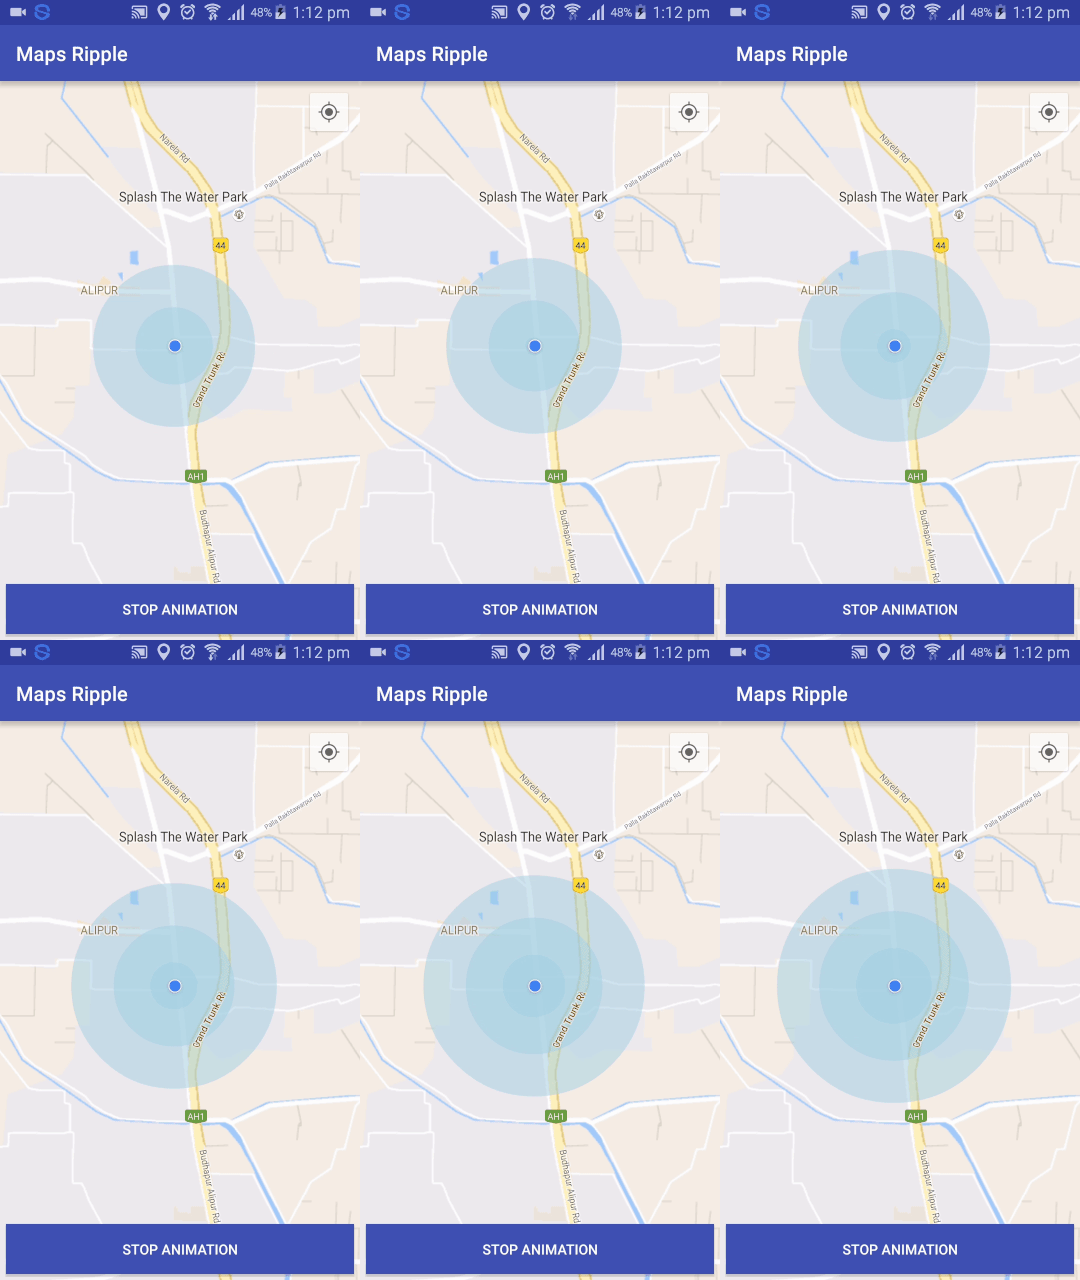
Example is given below (Preview shown above in first sample)

// mMap is GoogleMap object, latLng is the location on map from which ripple should start
MapRipple mapRipple = new MapRipple(mMap, latLng, context);
mapRipple.startRippleMapAnimation();      //in onMapReadyCallBack

@Override
protected void onStop() {
    super.onStop();
    if (mapRipple.isAnimationRunning()) {
        mapRipple.stopRippleMapAnimation();
    }
}

// Start Animation again only if it is not running
if (!mapRipple.isAnimationRunning()) {
    mapRipple.startRippleMapAnimation();
}

Advanced Ripple animation

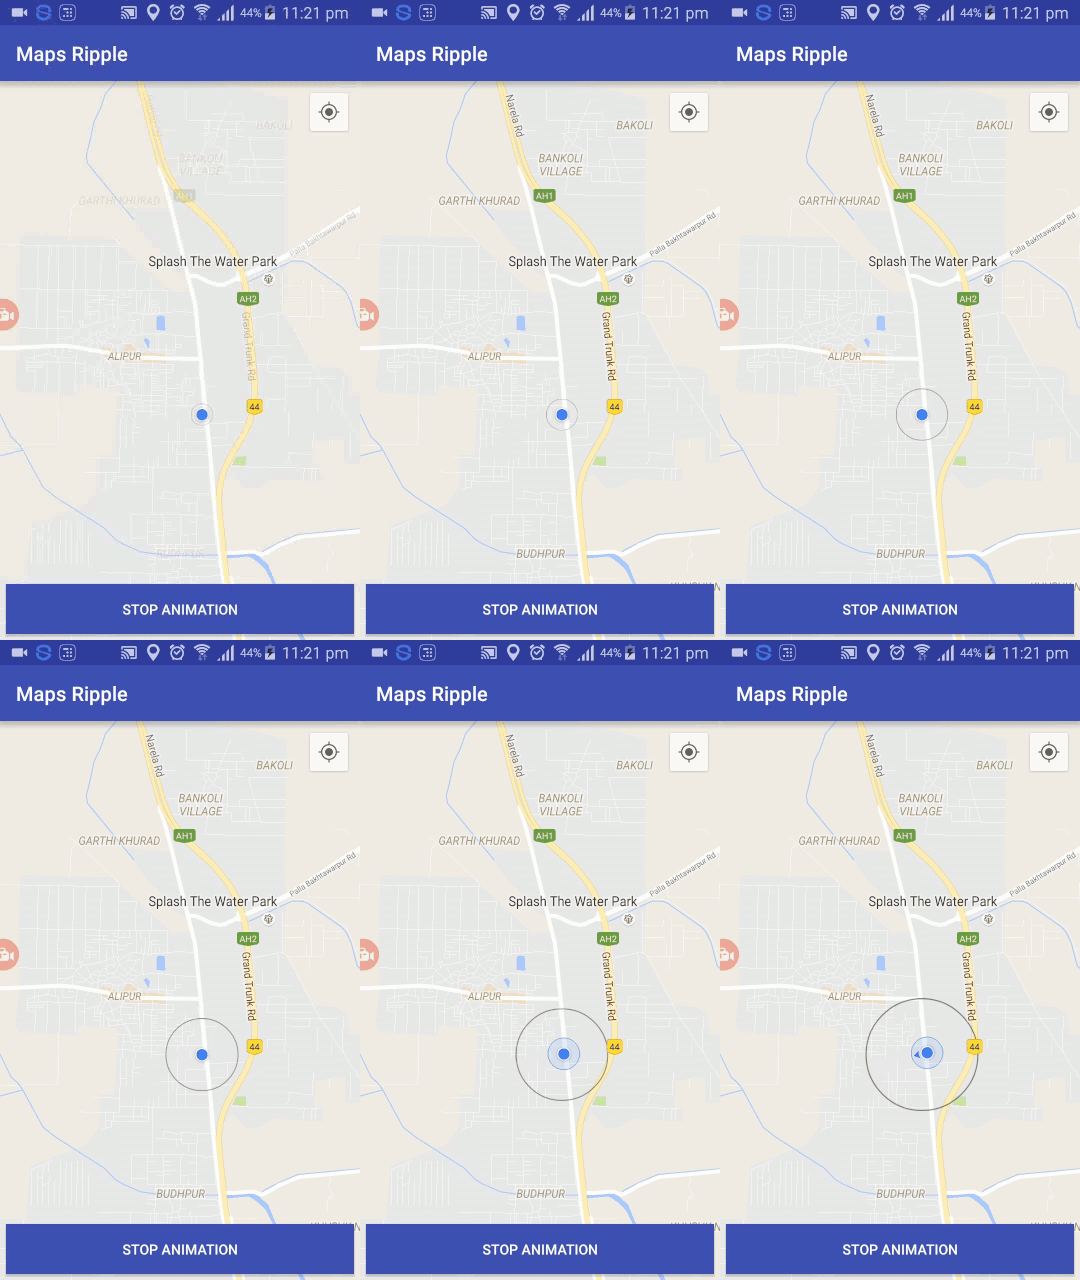
Example is given below (Preview shown above in second sample)

// mMap is GoogleMap object, latLng is the location on map from which ripple should start
MapRipple mapRipple = new MapRipple(mMap, latLng, context)
                            .withNumberOfRipples(3)
                            .withFillColor(Color.BLUE)
                            .withStrokeColor(Color.BLACK)
                            .withStrokewidth(10)      // 10dp
                            .withDistance(2000)      // 2000 metres radius
                            .withRippleDuration(12000)    //12000ms
                            .withTransparency(0.5f);
                    
mapRipple.startRippleMapAnimation();
// Use same procedure to stop Animation and start it again as mentioned anove in Default Ripple Animation Sample

Update center of ripple as location changes(Needed when user moves)

Just one line of code is needed:
Use .mapRipple.withLatLng(LatLng changedLatlng) method anytime in future to update center of ripple.

// after implementing LocationListener interface to current class use:
@Override
public void onLocationChanged(Location location) {
    mapRipple.withLatLng(new LatLng(location.getLatitude(), location.getLongitude()));
}
//See the sample for more help.

Radar Animation

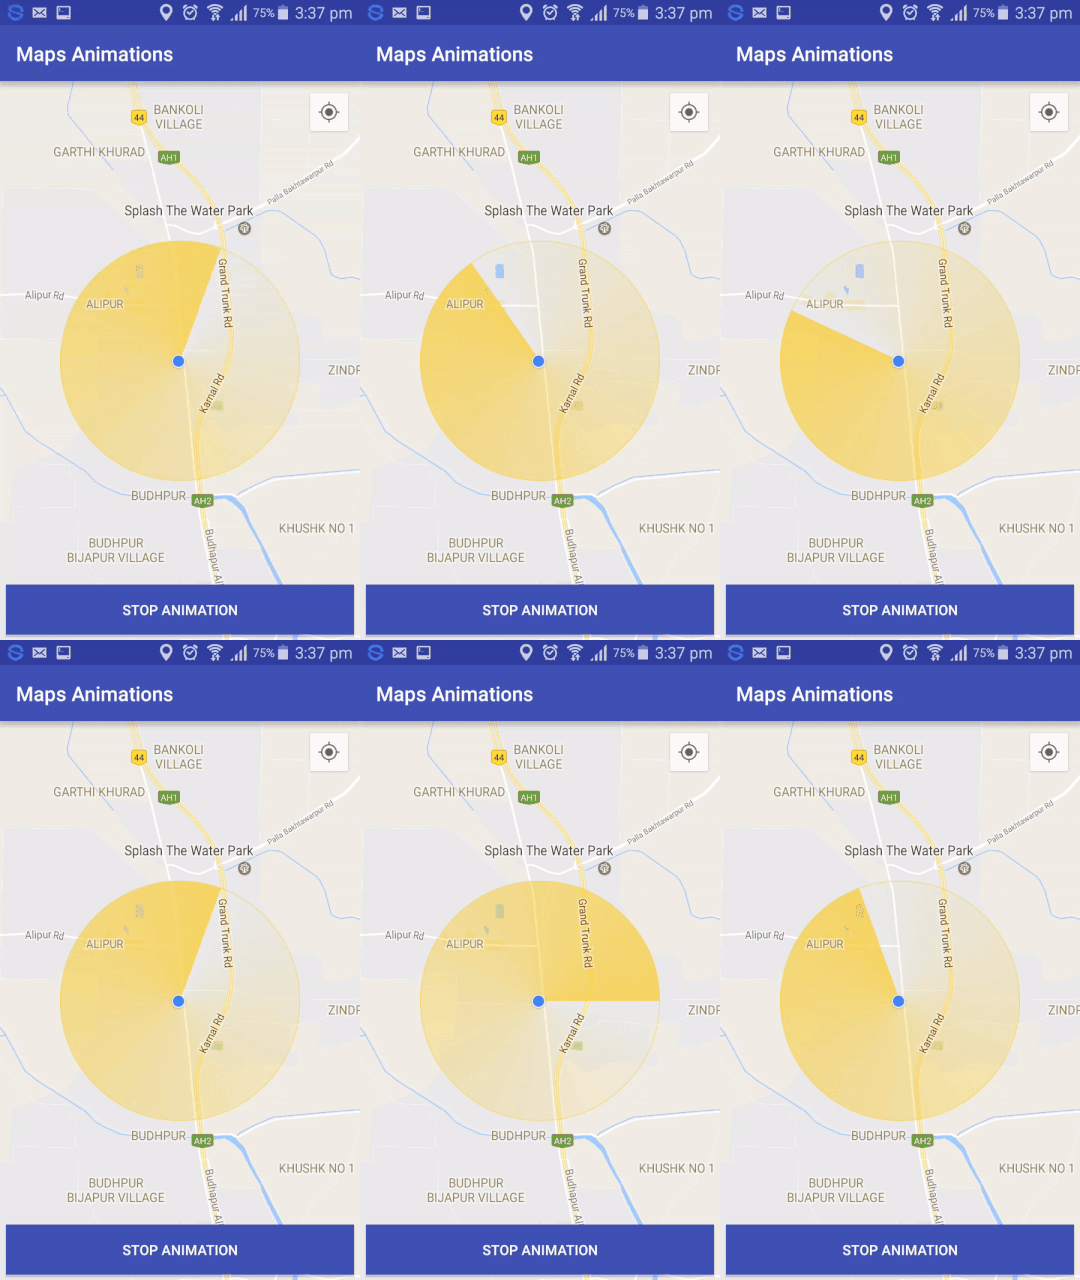
Simple Clockwise Radar animation

Just two lines of code :
Use .startRadarAnimation() and .stopRadarAnimation() methods to start and stop Animation.
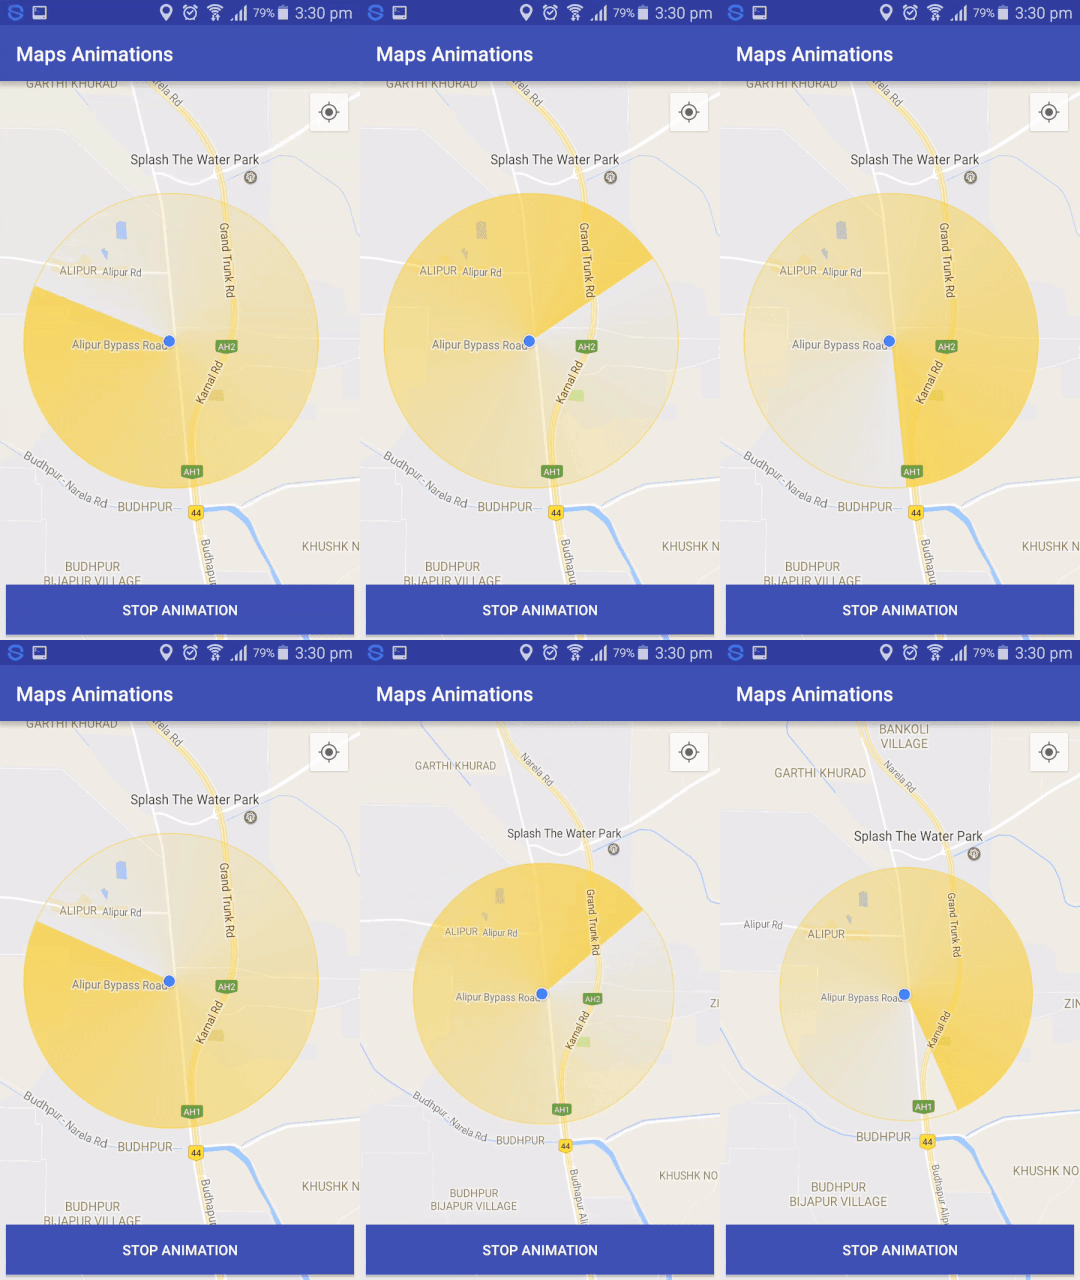
Example is given below (Preview shown above in third sample)

// mMap is GoogleMap object, latLng is the location on map from which ripple should start
MapRadar mapRadar = new MapRadar(mMap, latLng, context)
                            .withDistance(2000)
                            .withOuterCircleStrokeColor(0xfccd29)
                            .withRadarColors(0x00fccd29, 0xfffccd29)
                            //withRadarColors() have two parameters, startColor and tailColor respectively
                            //startColor should start with transparency, here 00 in front of fccd29 indicates fully transparent
                            //tailColor should end with opaqueness, here f in front of fccd29 indicates fully opaque
                            .startRadarAnimation();      //in onMapReadyCallBack

@Override
protected void onStop() {
    super.onStop();
    if (mapRadar.isAnimationRunning()) {
        mapRadar.stopRadarAnimation();
    }
}

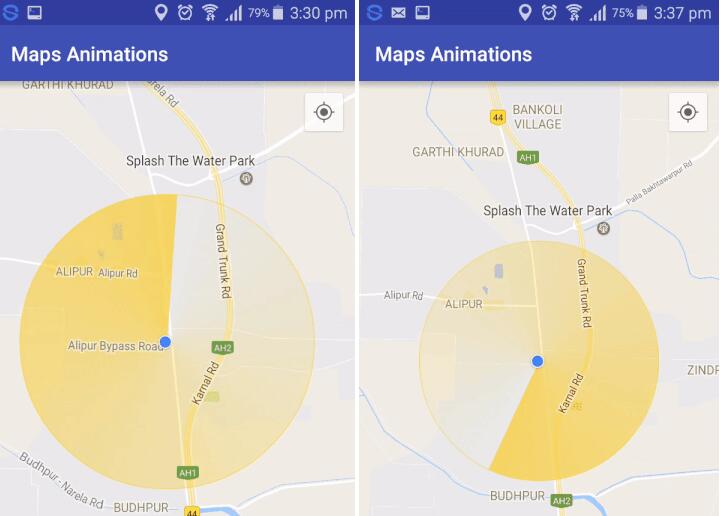
Advanced Clockwise and AntiClockwise Radar animation

Example is given below (Preview shown above in fourth sample)

// mMap is GoogleMap object, latLng is the location on map from which ripple should start
MapRadar mapRadar = new MapRadar(mMap, latLng, context)
                            .withDistance(2000)
                            .withOuterCircleStrokeColor(0xfccd29)
                            .withOuterCircleStrokewidth(7)
                            .withOuterCircleTransparency(0.4f)
                            .withClockWiseAnticlockwise(true)		//enable both side rotation
                            .withClockwiseAnticlockwiseDuration(2)
                            //withClockwiseAnticlockwiseDuration(duration), here duration denotes how much cycles should animation makes in 
                            //one direction
                            .withOuterCircleFillColor(0x12000000)
                            .withRadarColors(0x00fccd29, 0xfffccd29)
                            //withRadarColors() have two parameters, startColor and tailColor respectively
                            //startColor should start with transparency, here 00 in front of fccd29 indicates fully transparent
                            //tailColor should end with opaqueness, here f in front of fccd29 indicates fully opaque
                            .withRadarSpeed(5) //controls radar speed
                            .withRadarTransparency(0.4f);
mapRadar.startRadarAnimation();      //in onMapReadyCallBack

@Override
protected void onStop() {
    super.onStop();
    if (mapRadar.isAnimationRunning()) {
        mapRadar.stopRadarAnimation();
    }
}

Update center of radar as location changes(Needed when user moves)

Just one line of code is needed:
Use .mapRadar.withLatLng(LatLng changedLatlng) method anytime in future to update center of radar.
// after implementing LocationListener interface to current class use:
@Override
public void onLocationChanged(Location location) {
    mapRadar.withLatLng(new LatLng(location.getLatitude(), location.getLongitude()));
}
//See the sample for more help.

GitHub