WaveInApp

Welcome to WaveInApp - Audio Visualization View with wave effect.

Our library can take audio from any source (audio players, streams, voice input) and animate it with high frame rate. Cool animation, designed specially for the library, responds to sound vibrations. The animation becomes intense when music plays, and once it is paused or stopped – waves calm down.

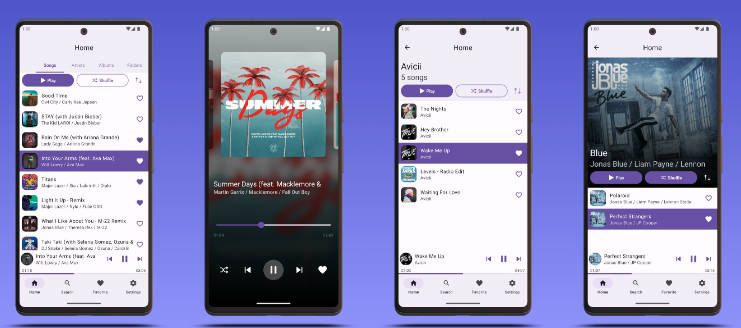
The library is a part of implementation of music player.

music-player.

Great visualization can spruce up any app, especially audio player. We suggest you smart and good-looking Audio Visualization View for your Android app. You can read about all the advantages this library has and find out how to implement it into your app in our blog post: Case Study: Audio Visualization View For Android by Cleveroad

article

Setup and usage

To include this library to your project add dependency in build.gradle file:

    dependencies {
        compile 'com.cleveroad:audiovisualization:1.0.0'
    }

Audio visualization view uses OpenGL ES 2.0 for drawing waves. So you need to include this line in your manifest:

    <uses-feature android:glEsVersion="0x00020000" android:required="true" />
Using VisualizerDbmHandler

All functionality of this handler built upon [Visualizer] object, so you also need to include this permissions in your manifest:

    <uses-permission android:name="android.permission.RECORD_AUDIO"/>
    <uses-permission android:name="android.permission.MODIFY_AUDIO_SETTINGS"/>
Using SpeechRecognizerDbmHandler

All functionality of this handler built upon [SpeechRecognizer] object, so you also need to include this permissions in your manifest:

    <uses-permission android:name="android.permission.RECORD_AUDIO"/>

You must be very careful with new [Android M permissions] flow. Make sure you have all necessary permissions before using GLAudioVisualizationView.

There are two ways to include GLAudioVisualizationView in your layout: directly in XML layout file or using builder in Java code.

Via XML:

    <com.cleveroad.audiovisualization.GLAudioVisualizationView
        xmlns:android="http://schemas.android.com/apk/res/android"
        xmlns:app="http://schemas.android.com/apk/res-auto"
        android:id="@+id/visualizer_view"
        android:layout_width="match_parent"
        android:layout_height="match_parent"
        app:av_bubblesSize="@dimen/bubble_size"
        app:av_bubblesRandomizeSizes="true"
        app:av_wavesHeight="@dimen/wave_height"
        app:av_wavesFooterHeight="@dimen/footer_height"
        app:av_wavesCount="7"
        app:av_layersCount="4"
        app:av_backgroundColor="@color/av_color_bg"
        app:av_bubblesPerLayer="16"
        />

Via Java code:

    new GLAudioVisualizationView.Builder(getContext())
        .setBubblesSize(R.dimen.bubble_size)
        .setBubblesRandomizeSize(true)
        .setWavesHeight(R.dimen.wave_height)
        .setWavesFooterHeight(R.dimen.footer_height)
        .setWavesCount(7)
        .setLayersCount(4)
        .setBackgroundColorRes(R.color.av_color_bg)
        .setLayerColors(R.array.av_colors)
        .setBubblesPerLayer(16)
        .build();

GLAudioVisualizationView implements AudioVisualization interface. If you don't need all [GLSurfaceView]'s public methods, you can simply cast your view to AudioVisualization interface and use it.

    private AudioVisualization audioVisualization;
    
    ...
    
    @Override
    public void onViewCreated(View view, @Nullable Bundle savedInstanceState) {
        super.onViewCreated(view, savedInstanceState);
        // you can extract AudioVisualization interface for simplifying things
        audioVisualization = (AudioVisualization) glAudioVisualizationView;
    }

    ...

To connect audio visualization view to audio output you can use linkTo(DbmHandler) method. See DbmHandler.Factory class for the list of available handler implementations.

    // set speech recognizer handler
    SpeechRecognizerDbmHandler speechRecHandler = DbmHandler.Factory.newSpeechRecognizerHandler(context);
    speechRecHandler.innerRecognitionListener(...);
    audioVisualization.linkTo(speechRecHandler);
    
    // set audio visualization handler. This will REPLACE previously set speech recognizer handler
    VisualizerDbmHandler vizualizerHandler = DbmHandler.Factory.newVisualizerHandler(getContext(), 0);
    audioVisualization.linkTo(vizualizerHandler);

You must always call onPause method to pause visualization and stop wasting CPU resources for computations in vain. As soon as your view appears in sight of user, call onResume.

    @Override
    public void onResume() {
        super.onResume();
        audioVisualization.onResume();
    }
    
    @Override
    public void onPause() {
        audioVisualization.onPause();
        super.onPause();
    }

When user leaves screen with audio visualization view, don't forget to free resources and call release() method.
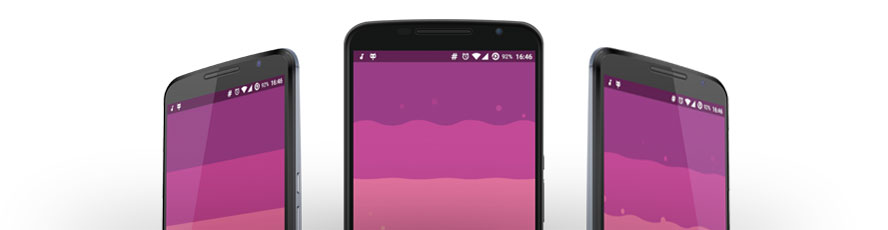
    @Override
    public void onDestroyView() {
        audioVisualization.release();
        super.onDestroyView();
    }

Live wallpapers

You can use our Audio Visualization View as a live wallpaper. Just create your own [WallpaperService]. Method onCreateEngine() should return your own [Engine]'s implementation, in which you must override the following methods:

  • void onCreate(SurfaceHolder surfaceHolder) – here create instances of DbmHandler, GLAudioVisualizationView.Builder (see example below) and GLAudioVisualizationView.AudioVisualizationRenderer in which you must set Engine's surface holder and two previous instances via constructor(GLAudioVisualizationView.Builder) and handler() methods;
  • void onVisibilityChanged(final boolean visible) – here you must call onResume() methods for audioVisualizationView and dbmHandler instances if visible parameter is true, otherwise – call onPause();
  • void onDestroy() – just call release() for dbmHandler and onDestroy() for audioVisualizationView instances
    Check JavaDoc of this methods for more info.
    public class AudioVisualizationWallpaperService extends WallpaperService {
        @Override
        public Engine onCreateEngine() {
            return new WallpaperEngine();
        }
        
        private class WallpaperEngine extends Engine {
        
        private WallpaperGLSurfaceView audioVisualizationView;
        private DbmHandler dbmHandler;
        private GLAudioVisualizationView.AudioVisualizationRenderer renderer;
        ...
            @Override
            public void onCreate(SurfaceHolder surfaceHolder) {
                AudioVisualizationWallpaperService context = AudioVisualizationWallpaperService.this;
                audioVisualizationView = new WallpaperGLSurfaceView(context);
                dbmHandler = DbmHandler.Factory.newVisualizerHandler(context, 0);
                ...
                GLAudioVisualizationView.Builder builder = new GLAudioVisualizationView.Builder(context)
                        //... set your settings here (see builder example below);
                renderer = new GLAudioVisualizationView.RendererBuilder(builder)
                        .glSurfaceView(audioVisualizationView)
                        .handler(dbmHandler)
                        .build();
                audioVisualizationView.setEGLContextClientVersion(2);
                audioVisualizationView.setRenderer(renderer);
            }
            @Override
            public void onVisibilityChanged(final boolean visible) {
                //Please follow the next order of methods call!
                if (visible) {
                    audioVisualizationView.onResume();
                    dbmHandler.onResume();
                } else {
                    dbmHandler.onPause();
                    audioVisualizationView.onPause();
                }
            }
            @Override
            public void onDestroy() {
                dbmHandler.release();
                audioVisualizationView.onDestroy();
            }
         

See uploaded [AudioVisualizationWallpaperService example].

Implementing your own DbmHandler

To implement you own data conversion handler, just extend your class from DbmHandler class and implement onDataReceivedImpl(T object, int layersCount, float[] outDbmValues, float[] outAmpValues) method where:

  • object - your custom data type
  • layersCount - count of layers you passed in Builder.
  • outDbmValues - array with size equals to layersCount. You should fill it with normalized dBm values for layer in range [0..1].
  • outAmpValues - array with size equals to layersCount. You should fill it with amplitude values for layer.
    Check JavaDoc of this method for more info.

Then call onDataReceived(T object) method to visualize your data.

Your handler also will receive onResume(), onPause() and release() events from audio visualization view.

GitHub