LoopingViewPager
A ViewPager and PagerAdapter combination that support auto scroll, infinite loop and page indicators.
A ViewPager and a PagerAdapter that can:
- AutoScroll (On/Off able)
- Infinite Loop (On/Off able)
- ViewPager's height can be wrap_content / an aspect ratio
- Adjustable auto scroll interval
- Won't scroll nor loop if there is only 1 item
- Works well with notifyDataSetChanged()
- Supports page indicators
- Supports different view types
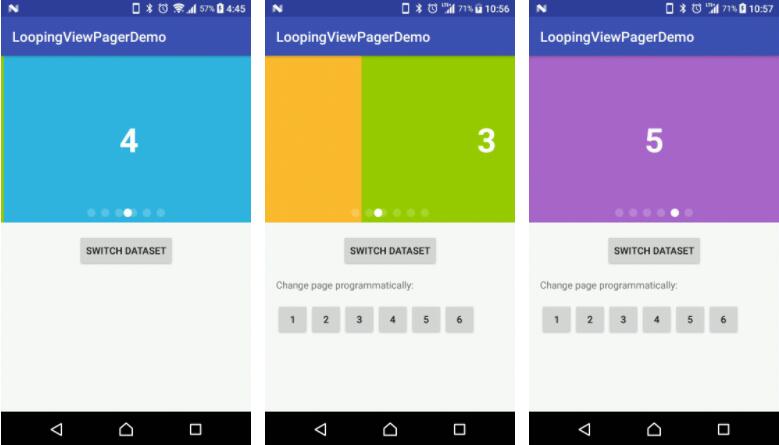
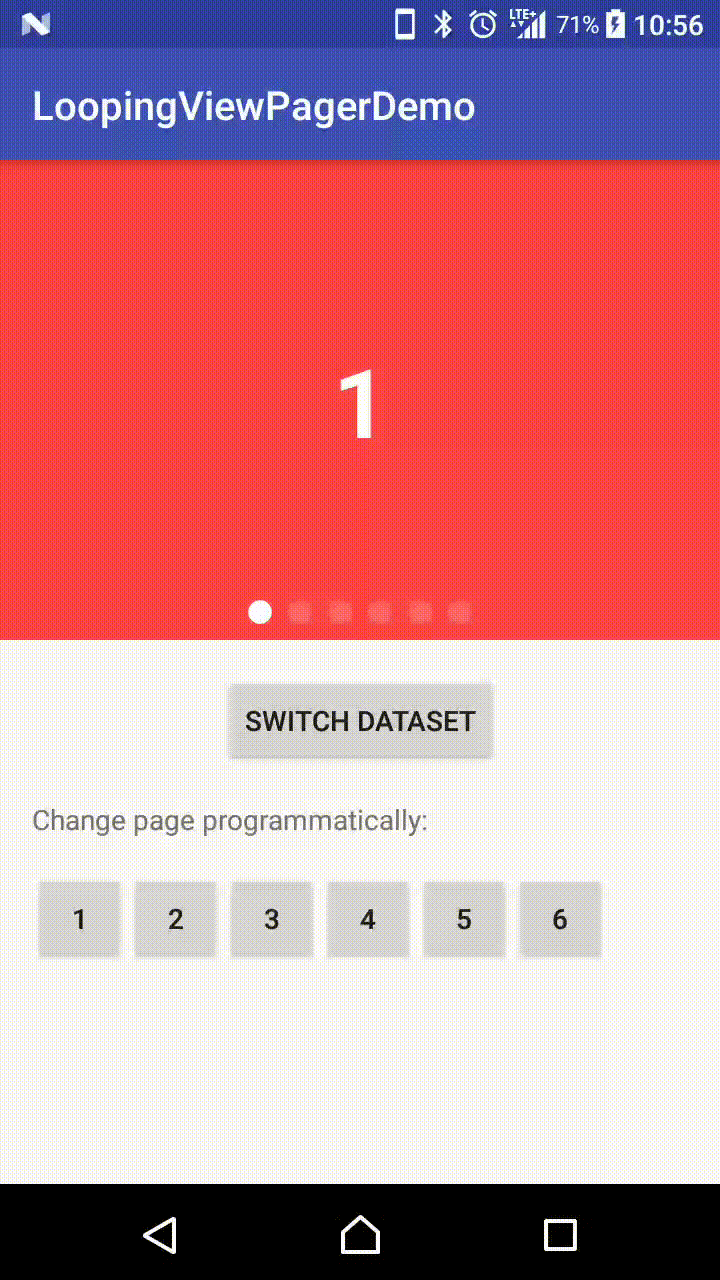
Demo Effect


Why this library
Although there are already quite a number of similar libraries out there,
I cannot find one that fits all of the below requirements:
- Sufficient documentation
- Last updated in less than 3 years
- Good infinite looping effect
- Configurable auto-scroll
- ViewPager that supports fixed aspect ratio (Or wrap_content)
- Good support with Page Indicators
Especially for 6, even some of them supports, they provide built-in indicators only; or does not tell user how to implement their own indicator.
I wrote this library to tackle all of these problems I faced after trying a whole day with other libraries.
Usage
Add to Project
First make sure jcenter() is included as a repository in your project's build.gradle:
And then add the below to your app's build.gradle:
Step 1: Create LoopingViewPager in XML
| Attribute Name | Default | Allowed Values |
|---|---|---|
| isInfinite | false | true / false |
| autoScroll | false | true / false |
| viewpagerAspectRatio | 0 | any float (width / height) |
| wrap_content | true | true / false |
| scrollInterval | 5000 | any integer (represents ms) |
viewpagerAspectRatio 0 means does not apply aspectRatio.
That means, default LoopingViewPager has no aspect ratio and wrap_content is true.
Once aspect ratio is set, wrap_content will be overrided (meaningless).
In most cases, you should set an aspect ratio.
If you wonder why you need to set app:wrap_content="true", take a look at this Stackoverflow post.
Step 2: Create your PagerAdapter that extends LoopingPagerAdapter
You should
- Specify the data type in the generic (
<DataType>) - Create your own constructor according to this
DataType - override
inflateView()andbindView()
Step 3: Bind LoopingViewPager with your Adapter
Step 4: Resume and Pause autoScroll in your Activity (If you need autoScroll)
Handling dataSet change
If you have new data to update to your adapter, simply call:
How do I implement different View types?
Simple! Override one more method in your Adapter:
And then, of course, according to the viewtype parameter passed to you in inflateView() and bindView(), differentiate what you need to inflate or bind.
You may also refer to the demo app for a complete example.
How do I integrate a Page Indicator?
I don't provide a built-in page indicator because:
- ViewPager and Indicator are logically separated
- I want to make this library adaptable to all page indicators
With that said, I personally suggest using this PageIndicatorView.
I create this demo and tested using this library.
Principle
There are 2 callbacks in LoopingViewPager that are designed to tell a PageIndicator 2 things:
- I am now being scrolled to a new page, please update your indicator transition position;
- I am now being selected to a new page, please update your indicator selected position.
And a public method getIndicatorCount() that can tell the indicator how many indicators(dots) should it show.
Example
And here is an example using PageIndicatorView:
Don't forget to update the indicator counts if you updated items in adapter:
By implementing this way, you can basically use any indicators you like, as long as that indicator allows you to configure programmatically (1) The number of indicators; (2) Which indicator is selected. And even, if it supports, (3) The progress of indicator transition effect.
Advanced: Interactive Indicator Animation
You may have already noticed, there is an interactive effect - where the indicator position follows the swipe action of user, as shown in the second GIF in the demo section.
If you want to do this, use the below instead:
In my demo, I am using the PageIndicatorView.
This PageIndicatorView expects you to handle the indicator progress solely by yourself, i.e. The indicator will not finish its animation if you call setSelection() on it.
e.g. I scrolled to 50% from page 1 to page 2. Then I released by finger. PageIndicatorView expects you to continue calling setProgress() from 0.5, 0.6, all the way to 0.99, 1.0; instead of calling setCurrentItem() the moment you released your finger.
I call this type of indicator non-smart. Default handling of LoopingViewPager treats indicator as non-smart.
If you have another IndicatorView which is smart (i.e. It will finish the animation by itself if you call setSelection() the moment user released his finger), do the following:
By setting this, LoopingViewPager will call onIndicatorProgress() only when user is dragging, but not after he released his finger.
Therefore you should call indicatorView.setSelection(newIndicatorPosition) in onIndicatorPageChange().
However, I have to warn you that, up to the current release, the effect of onIndicatorProgress() is still imperfect on non-smart indicators.
As far as I can find out, I noticed the below problems:
- If user swipes very fastly, i.e. before
ViewPagerreachesSCROLL_STATE_IDLE, directly fromSCROLL_STATE_SETTLINGtoSCROLL_STATE_DRAGGING, the indicator will not move until user released his finger again. This is not obvious unless user is attempting to test this indicator effect. - If user skip pages very fastly, e.g. from page 1 to page 6 and then to page 3 quickly, the indicator may appears in a wrong position for a short moment.
if you cannot accept these minor defects, I suggest you use onIndicatorPageChange() only.