Jetpack Compose Launcher
Jetpack Compose Launcher
Goodbye Activity
When you’re develop an Android application only with Jetpack Compose, you probably don’t need to aware about Activities.
This library automatically create the Activity class from a Composable functions with an Entry
annotation with KSP.
You can start development quickly without touching the Activity or the AndroidManifest.
Getting Started
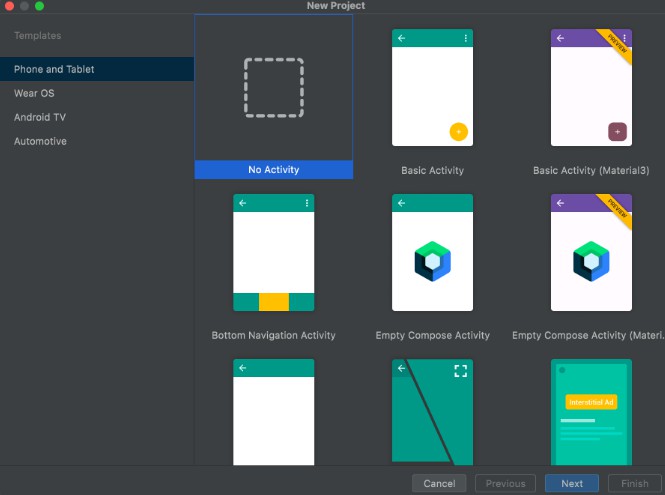
1. Create new project without Activity
Select No Activity from Android Studio > File > New > New Project.

2. Add dependencies
Add Maven Central repository to your build.gradle.
repositories {
    mavenCentral()
}
Add the package dependencies to your build.gradle.
You’ll need to enable KSP.
build.gradle.ktsplugins {
id("com.google.devtools.ksp").version("1.7.10-1.0.6")
}
android {
// Make IDE aware of generated code
sourceSets {
getByName("debug") {
kotlin.srcDirs("build/generated/ksp/debug/kotlin")
}
getByName("release") {
kotlin.srcDirs("build/generated/ksp/release/kotlin")
}
}
}
dependencies {
implementation("com.moriatsushi.launcher:launcher:1.0.0-alpha02")
ksp("com.moriatsushi.launcher:launcher-processor:1.0.0-alpha02")
}
Add Jetpack Compose dependencies according to your needs.
build.gradle.ktsandroid {
// ...
buildFeatures {
compose = true
}
compileOptions {
sourceCompatibility(JavaVersion.VERSION_1_8)
targetCompatibility(JavaVersion.VERSION_1_8)
}
composeOptions {
kotlinCompilerExtensionVersion = "1.3.0"
}
kotlinOptions {
jvmTarget = "1.8"
}
}
dependencies {
// ...
implementation("androidx.compose.ui:ui:1.2.1")
implementation("androidx.compose.ui:ui-tooling:1.2.1")
implementation("androidx.compose.foundation:foundation:1.2.1")
implementation("androidx.compose.material:material:1.2.1")
}
3. Write Composable function with Entry annotation
By set default parameter to true, the screen will be displayed automatically when the application starts.
import androidx.compose.material.*
import androidx.compose.runtime.Composable
import com.moriatsushi.launcher.Entry

// A entry displayed when the application starts.
// The default entry is at most one.
@Entry(default = true)
@Composable
fun Main() {
    MaterialTheme {
        Scaffold {
            /* ... */
        }
    }
}
Launch Other Entry
It is possible to create multiple entries and transition between them.
import androidx.compose.foundation.layout.*
import androidx.compose.material.*
import androidx.compose.runtime.*
import androidx.compose.ui.*
import com.moriatsushi.launcher.Entry

@Entry(default = true)
@Composable
fun Main() {
    MaterialTheme {
        // `rememberOtherLauncher` is generated
        val otherLauncher = rememberOtherLauncher()

        Box(
            modifier = Modifier.fillMaxSize(),
            contentAlignment = Alignment.Center,
        ) {
            Button(
                onClick = {
                    // Go to Other entry
                    otherLauncher.launch()
                },
            ) {
                Text(text = "launch Other page")
            }
        }
    }
}

@Entry
@Composable
fun Other() {
    MaterialTheme {
        /* ... */
    }
}
You can also transition from Activity or Fragment.
class SampleActivity : ComponentActivity() {
    // `getOtherLauncher` is generated
    private val launcher = getOtherLauncher(this)

    override fun onCreate(savedInstanceState: Bundle?) {
        super.onCreate(savedInstanceState)

        setContentView(R.layout.layout_file)
        findViewById<TextView>(R.id.text).setOnClickListener {
            // Go to Other entry
            launcher.launch()
        }
    }
}