Simple Bottom Navigation
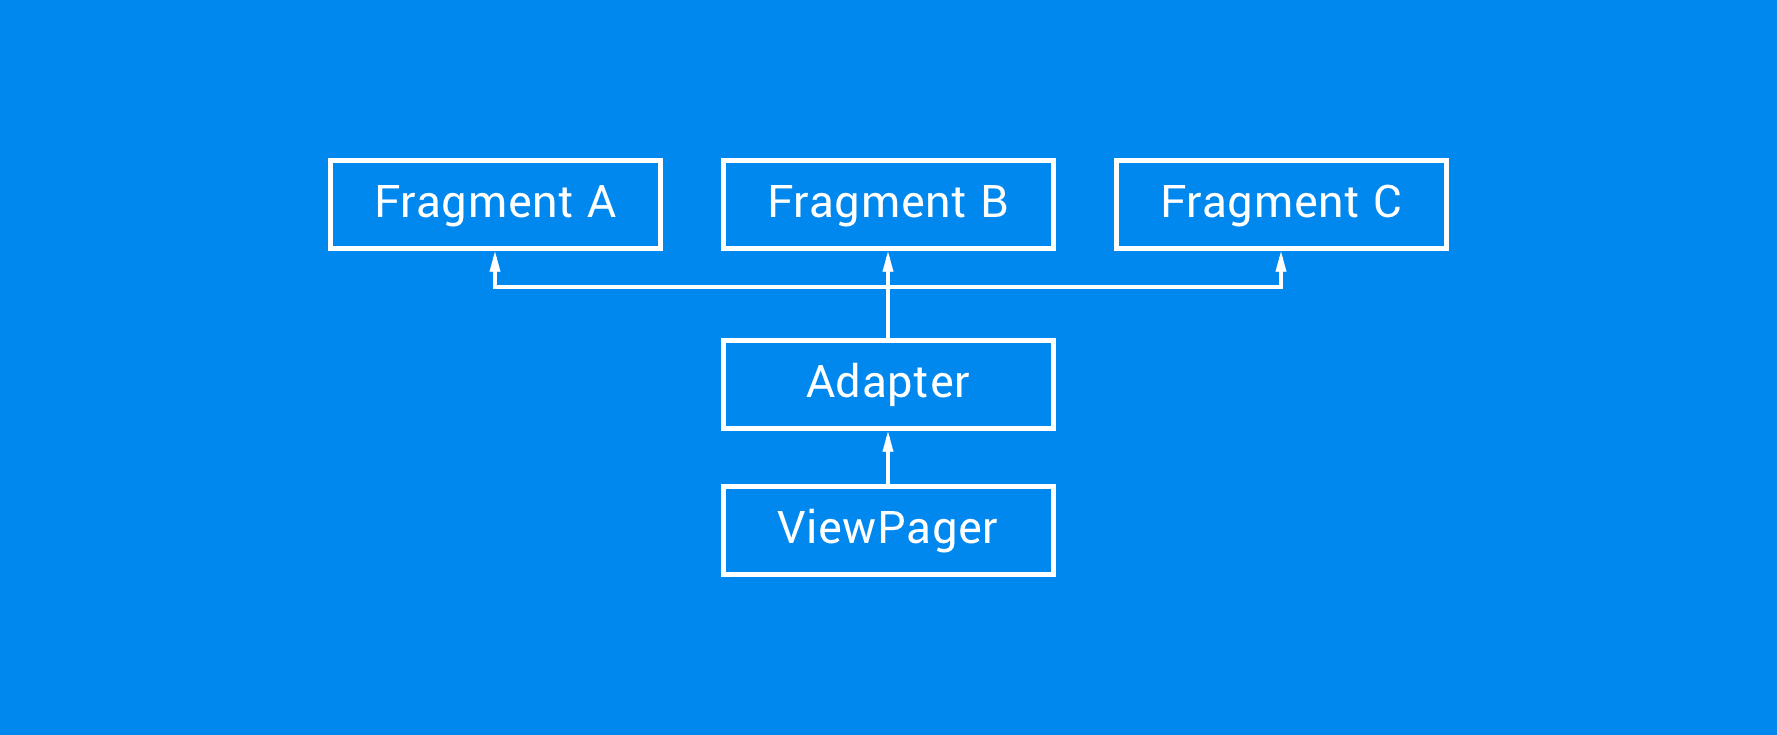
When using a TabLayout within your application, using a ViewPager along with an adapter offers an easy way to quickly link up your views for display.
The FragmentAdapter class takes care of all the hard work for you when it comes to switching between the views as the user selected a different item in the TabLayout. This process is made up something a little like this:
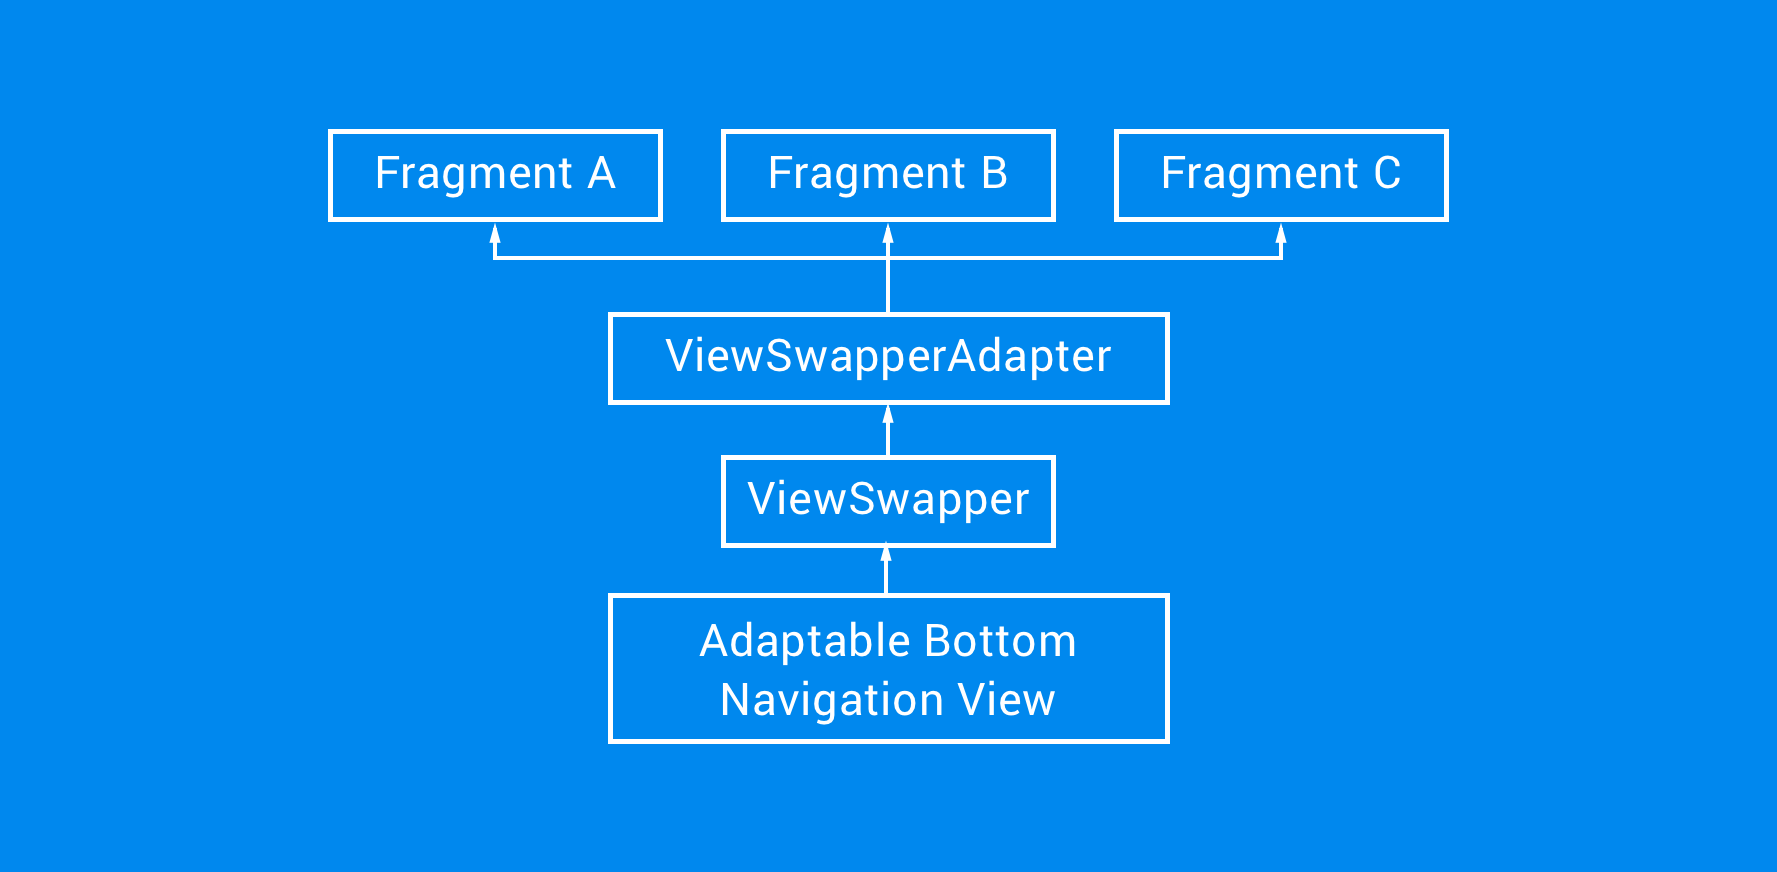
This is great as it allows you to decouple this presentation logic from your activities or other classes. However, when it comes to implementing the BottomNavigationView from the design support library, we're not blessed with the same niceties. This requires your activity (or fragment) that is hosting the BottomNavigationView to house the logic used for the handling of such events. We can't use the ViewPager for Bottom Navigation as the way the view works breaks the design guidelines - so we created this library here to allow you to easily create an adapter for use with Bottom Navigation so that you can work with the view in a way in which you are familiar with when it comes to the ViewPager. This setup looks a little like this:
So, what is this library?
As mentioned, when using the Bottom Navigation View from the Android Support Library, there can be a lot of boilerplate code for the switching of views. Because of this, we took inspiration from the TabLayout setupWithViewPager() method and created a custom ViewSwapper component that can be attached to a Bottom Navigation View to simplify the management of view display. Within this library are three core components that you'll need to use:
-
AdaptableBottomNavigationView - The Bottom Navigation View for displaying navigation items in a bar at the bottom of the screen. This view extends the BottomNavigationView from the Design Support Library, so the two classes are easily interchangable in your projects.
-
ViewSwapper - The View Swapper is used to easily switch between fragments that you wish to display to the user. Unlike the View pager, views will not transition between pages and swiping is not possible - hence adhering to the Design Principles for the Bottom Navigation View. This view is essentially a tweaked version of the ViewPager component that you're probably familiar with already!
-
FragmentStateAdapter / FragmentAdapter - An abstract adapter that allows you to create an adapter for displaying fragments within the ViewSwapper. These classes are the same as the implementations found within the Android Framework, agan with a few tweaks to better match the behaviour of the View Swapper component.
But how's it different from using a ViewPager?
In the library you'll notice the ViewSwapper component. This is similar to the ViewPager except it has a view differences:
-
Unlike the viewpager, it doesn't draw all views within the component at once. The Views are simply added and removed as the item to be displayed has been selected
-
The ViewSwapper doesn't allow swiping between views - this allows us to adhere to the guidelines for not allowing the Bottom Navigation to be interacted with in this way
How to use
In order to use this ViewSwapper component you need to use our SimpleBottomNavigationView - this is simply an extension of the support library component with the added functionality of ViewSwapper attachment and elevation. This will look like so in your layout file:
<org.buffer.adaptablebottomnavigation.view.ViewSwapper
    android:id="@+id/view_swapper"
    android:layout_width="match_parent"
    android:layout_height="match_parent"
    android:layout_above="@+id/view_bottom_navigation" />

<org.buffer.adaptablebottomnavigation.AdaptableBottomNavigationView
    android:id="@+id/view_bottom_navigation"
    android:layout_width="match_parent"
    android:layout_height="wrap_content"
    android:layout_alignParentBottom="true"
    android:background="@color/colorPrimary"
    app:itemBackground="@color/colorPrimary"
    app:itemIconTint="@drawable/selector_menu"
    app:itemTextColor="@drawable/selector_menu"
    app:menu="@menu/main" />
Next, you'll need to create an adapter using either the FragmentStateAdapter or FragmentAdapter classes from the library. These are the essentially the same as the corresponding adapter classes found in the Android Framework. This could look something like so:
public class ViewSwapperAdapter extends FragmentStateAdapter {

    private static final int INDEX_BUFFER = 0;
    private static final int INDEX_RETREAT = 1;
    private static final int INDEX_VALUES = 2;

    public ViewSwapperAdapter(FragmentManager fm) {
        super(fm);
    }

    @Override
    public Fragment getItem(int position) {
        switch (position) {
            case INDEX_BUFFER:
                return ImageFragment.newInstance(R.drawable.cat);
            case INDEX_RETREAT:
                return ImageFragment.newInstance(R.drawable.buffer);
            case INDEX_VALUES:
                return ImageFragment.newInstance(R.drawable.android);
        }
        return ImageFragment.newInstance(R.drawable.cat);
    }

    @Override
    public int getCount() {
        return 3;
    }

}
Now we have the views defined in our layout and the adapter to manage the display of our fragments (or views), we can go ahead and set the adapter for the View Swapper followed by attaching the View Swapper to the Bottom Navigation View:
e.g.
viewSwapper.setAdapter(viewSwapperAdapter);
bottomNavigationView.setupWithViewSwapper(viewSwapper);